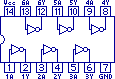
For Christmas, my wife bought me a ZM1177 Nixie QTC Clock kit from http://www.pvelectronics.co.uk
It took me all Saturday afternoon to make, mostly soldering and snipping wires. There was a bit of a mess up with the plexiglass case as I was sent 2 base parts and no top part with holes for the tubes. However a quick email to the vendor and the correct part was mailed out straight away. Excellent Service!
I also got the GPS option so the time is always right.
And here it is.....
Some people like to build cars from scratch, well I'm going to build a computer from scratch. I have no idea what I am doing (well I know what a computer is and what it is made up of, but my electronics experience is very limited). Here goes...
Thursday, 3 January 2013
Tuesday, 7 August 2012
37. Raspberry Pi Case.
Just got this case for my Raspberry Pi. I got it from http://www.modmypi.com. Its very good. Fit is perfect, it doesn't rattle around in the case and the quality is very good too. You can choose any colours you like and even mix and match top and bottom case colours. The case clips together very solidly and comes with some stick on clear rubber feet. Well worth the money.
Friday, 3 August 2012
36. Apple 1 - Hello World!
It's been a while. I've been getting distracted by all things geeky. I thought I'd share this though.
I became curious by the Apple-1, the original must have Apple product, the Ford Model T of computers if you like. All you got was a circuit board, but no keyboard or monitor (a bit like the raspberry Pi of its day). I decided to look for an emulator for it, and at this stage knew nothing of the Apple-1's underpinnings. It wasn't a Z80 but my old friend the 6502. I've not touched the 6502 since secondary school when I used to play with the Commodore PET/CBM in the early 80's.
I got the Pom-1 emulator in Java flavor and downloaded the Apple-1 manual.
I soon realised that to program the Apple-1 you just entered 6502 machine codes and ran the machine code programs. No BASIC interpreter (although there is a 6502 program for the Apple-1 that you can load in to get BASIC). So I set about relearning 6502 machine language and so far my efforts have resulted in my first "Hello World!" program.
Here's a screenshot of the code and it running:
\ is the only screen indication that the Apple-1 is alive. 0.22 displays the first 23 bytes and R runs from address 0.
Why is this relevant? Well this is something like what I want to build with the Z80
I became curious by the Apple-1, the original must have Apple product, the Ford Model T of computers if you like. All you got was a circuit board, but no keyboard or monitor (a bit like the raspberry Pi of its day). I decided to look for an emulator for it, and at this stage knew nothing of the Apple-1's underpinnings. It wasn't a Z80 but my old friend the 6502. I've not touched the 6502 since secondary school when I used to play with the Commodore PET/CBM in the early 80's.
I got the Pom-1 emulator in Java flavor and downloaded the Apple-1 manual.
I soon realised that to program the Apple-1 you just entered 6502 machine codes and ran the machine code programs. No BASIC interpreter (although there is a 6502 program for the Apple-1 that you can load in to get BASIC). So I set about relearning 6502 machine language and so far my efforts have resulted in my first "Hello World!" program.
Here's a screenshot of the code and it running:
\ is the only screen indication that the Apple-1 is alive. 0.22 displays the first 23 bytes and R runs from address 0.
Why is this relevant? Well this is something like what I want to build with the Z80
Sunday, 20 May 2012
35. Floppy Drive Music. Stage 1.
Ok well, I need to find time to understand the radio stuff, so I'm gonna park that for now and move on to Floopy Drive Music. Ok yes, its been done before (as has most of the stuff I'm doing), but I haven't done it yet.
So what is floppy drive music? Well by stepping the drive's motor at different speeds we can get different pitches from it. Combine the different pitches and you get music.
I'm going to use the Arduino Uno to start with but I may program a PIC chip to do the same later.
After a bit of reading on the web, it seems the Arduino will not have enough power from the +5V supply to power the floppy drive. Its recommended to use another power source.
So I have an old PC power supply handy which should do the job. However, when its disconnected from its host PC's motherboard, its does nothing when plugged into the mains. Fortunately you can fake this by shorting the PS_ON# pin to it's adjacent COM (see http://www.smpspowersupply.com/connectors-pinouts.html for pin details).
Of course using a PC PSU (Power Supply Unit) means it come with all the connectors to connect to the power pins of floppy drive, and andthing else you might want to plug in.
Pins connected, plugged in and powered on. Fan on the PSU starts and floppy drive makes a short whirring noise.
So what is floppy drive music? Well by stepping the drive's motor at different speeds we can get different pitches from it. Combine the different pitches and you get music.
I'm going to use the Arduino Uno to start with but I may program a PIC chip to do the same later.
After a bit of reading on the web, it seems the Arduino will not have enough power from the +5V supply to power the floppy drive. Its recommended to use another power source.
So I have an old PC power supply handy which should do the job. However, when its disconnected from its host PC's motherboard, its does nothing when plugged into the mains. Fortunately you can fake this by shorting the PS_ON# pin to it's adjacent COM (see http://www.smpspowersupply.com/connectors-pinouts.html for pin details).
Of course using a PC PSU (Power Supply Unit) means it come with all the connectors to connect to the power pins of floppy drive, and andthing else you might want to plug in.
Pins connected, plugged in and powered on. Fan on the PSU starts and floppy drive makes a short whirring noise.
Thursday, 12 April 2012
34. Diversion into radio.
The lack of any joy with the MSF signal has got me thinking about radio electronics.
I connect a wire to CH1 on my Xprotolabs Oscilloscope because I remember getting random signals once before.
Here's watch I picked up.
Its very weak, the oscilloscope settings are at max resolution. Somewhere in there is probably the MSF signal.
Now while this is a divergence from the Z80 theme, I think its well worth looking into so improve my electronics knowledge as this is part if the journey.
So I learnt recently about transistors, and how they can amplify a signal. So lets amplify this and see what we can make of it...
Here's watch I picked up.
Its very weak, the oscilloscope settings are at max resolution. Somewhere in there is probably the MSF signal.
Now while this is a divergence from the Z80 theme, I think its well worth looking into so improve my electronics knowledge as this is part if the journey.
So I learnt recently about transistors, and how they can amplify a signal. So lets amplify this and see what we can make of it...
Thursday, 5 April 2012
33. Radio Ga Ga
Rather than set the time myself, I thought I might be able to get the time signal from the Rugby Transmitter in the UK. Well its not in Rugby anymore but the name still sticks. Its in Anthorn in Cumbria and is called the MSF Signal transmitting on 60KHz. The National Physics Laboratory (NPL) give you all the details of how to decode the signal so all I need is a receiver.
I bought one from PV Electronics. It come with an antenna and a receiver module which sends a signal that you can simply connect to an IC and decode the message.
Well I get a signal, but not very well. Its anything I can use. I should get a pulse of varying length every second, but all I get are random on/offs. I have no way to tell if either the antenna or the receiver are faulty. I am assuming that I am not getting very good reception. It does get better when I point the antenna directly towards Anthorn, but still nothing useful.
Maybe I just need a bigger antenna, so I started reading about them so I could make one, and found that its not a simple subject. Check this out: http://www.antenna-theory.com/ My brain hurts!
A glimmer of hope though, it turns out that MSF was turned off from 26/03/2012 until today. Alas no, still a random signal.
I bought one from PV Electronics. It come with an antenna and a receiver module which sends a signal that you can simply connect to an IC and decode the message.
Well I get a signal, but not very well. Its anything I can use. I should get a pulse of varying length every second, but all I get are random on/offs. I have no way to tell if either the antenna or the receiver are faulty. I am assuming that I am not getting very good reception. It does get better when I point the antenna directly towards Anthorn, but still nothing useful.
Maybe I just need a bigger antenna, so I started reading about them so I could make one, and found that its not a simple subject. Check this out: http://www.antenna-theory.com/ My brain hurts!
A glimmer of hope though, it turns out that MSF was turned off from 26/03/2012 until today. Alas no, still a random signal.
Saturday, 3 March 2012
32. PIC Clock - Tic 2
I wanted to see how far I could push the clock idea by adding two more dual 7 segment displays to add seconds and information. This meant controlling 8 transistors, however with all pins on the PIC16F505 used up from the last version I had to come up with a way to control 8 digits from 4 pins. Well as it happens, using binary, 3 pins are enough to control 8 outputs. Binary 000 to 111 is 8 different values.
Now as luck would have it, there is such a thing as an 8 bit decoder controlled by 3 inputs in the guise of a 74LS238. There are many manufacturers and I used an M74HC238B1 from ST Microelectronics. Its does exactly the same thing.
Using 1 less pin to control the 8 digits means I have a pin left over. This gives me an extra button to control the functions of the clock. I have yet to program these in but the its all wired up ready. All you can do is increase the minutes as before. The day was hardcoded so it always says SA for Saturday.
I programmed in the entire alphabet (well as best you can with a 7 segment display as M,W,K,Q and X are not ideal) and this means I can display the day (Mo, Tu, We etc.), mode (AL for alarm, Yr for year etc.) amongst other uses I have yet to conjour.
Here is it displaying Saturday 10:39 and 41 seconds.
With the additional displays there is a noticeable flicker as each one is updated and this is because the delay between refreshing each digit has doubled from 4x4ms to 8x4ms. I've not addressed this as its not that bad. Using a faster external oscillator is one option but all pins on the PIC are used so the alternatives are to halve the prescaler for TMR0 or use a different PIC with a faster internal oscillator.
Now as luck would have it, there is such a thing as an 8 bit decoder controlled by 3 inputs in the guise of a 74LS238. There are many manufacturers and I used an M74HC238B1 from ST Microelectronics. Its does exactly the same thing.
Using 1 less pin to control the 8 digits means I have a pin left over. This gives me an extra button to control the functions of the clock. I have yet to program these in but the its all wired up ready. All you can do is increase the minutes as before. The day was hardcoded so it always says SA for Saturday.
I programmed in the entire alphabet (well as best you can with a 7 segment display as M,W,K,Q and X are not ideal) and this means I can display the day (Mo, Tu, We etc.), mode (AL for alarm, Yr for year etc.) amongst other uses I have yet to conjour.
Here is it displaying Saturday 10:39 and 41 seconds.
With the additional displays there is a noticeable flicker as each one is updated and this is because the delay between refreshing each digit has doubled from 4x4ms to 8x4ms. I've not addressed this as its not that bad. Using a faster external oscillator is one option but all pins on the PIC are used so the alternatives are to halve the prescaler for TMR0 or use a different PIC with a faster internal oscillator.
Saturday, 18 February 2012
31. PIC Controlled Digital Clock.
Following on from my new found friend the transistor, I had the idea to use four of them to switch on four 7 segment LED displays. Using 7 outputs from the PIC16F505 to control the segments a,b,c,d,e,f & g, another 4 outputs would switch each digit on in sequence. As it would be very fast you would see all digits on.
This I realised would make a good clock project.
With the PIC16F505 there are 14 pins, one for VCC on for GND and 12 can be used for I/O, 4 for controlling each 7 segment display, 7 for the individual segments and 1 to act as a time adjustment input. One of the pins can only be an input but all the others are bi-directional if needed so the input only pin was assign for the clock adjustment.
Something to bare in mind when writing code for a clock is that you must keep refreshing the display. Its no good writing the time out then waiting for a minute because all you will see is the last digit. You have to keep writing over and over to fool the eye into seeing a continuous display. In order to do this you must sync the time between displaying each digit. The internal clock runs at 4MHz and the internal timer (TMR0) is incremented on each instruction cycle which is made of 4 clock pulses. Effectively then the timer is 1/4 of the clock i.e 1MHz. By setting the PIC prescaler to 1:32 (dividing the timer by 32), you have time to run code to display one digit and wait for 125 tics at 1MHz/32/125 which makes 4ms. So the time between displaying each digit is 4ms. Keeping a count of the 4ms increments, when we reach 250 we have 1 second. Keep a count of the seconds and you then have your minutes.
The prescaler effectively tells you how many instructions can be executed between TMR0 tics so at 1:32 it equates to 32 instructions. The whole of my PIC program is 163 instructions (163 12bit bytes). We wait for 125 lots of 32 instructions before we increment the 4ms counter and move onto the next digit. What I am trying to point out here is that TMR0 may have ticked over a few times before you reach the checking loop.
One last timing issue is how to check for the clock-set button being pressed. This also needs to be done between each digit and allow the minutes to incremented reasonable quickly to set the time. This can be done by checking bit 5 of the 4ms counter, if set then check the input line and if that's set then increment the minutes.
Here some of the timing code that sits between each digit being displayed to show you how I've done it:
The breadboard layout looks like this:
This I realised would make a good clock project.
With the PIC16F505 there are 14 pins, one for VCC on for GND and 12 can be used for I/O, 4 for controlling each 7 segment display, 7 for the individual segments and 1 to act as a time adjustment input. One of the pins can only be an input but all the others are bi-directional if needed so the input only pin was assign for the clock adjustment.
Something to bare in mind when writing code for a clock is that you must keep refreshing the display. Its no good writing the time out then waiting for a minute because all you will see is the last digit. You have to keep writing over and over to fool the eye into seeing a continuous display. In order to do this you must sync the time between displaying each digit. The internal clock runs at 4MHz and the internal timer (TMR0) is incremented on each instruction cycle which is made of 4 clock pulses. Effectively then the timer is 1/4 of the clock i.e 1MHz. By setting the PIC prescaler to 1:32 (dividing the timer by 32), you have time to run code to display one digit and wait for 125 tics at 1MHz/32/125 which makes 4ms. So the time between displaying each digit is 4ms. Keeping a count of the 4ms increments, when we reach 250 we have 1 second. Keep a count of the seconds and you then have your minutes.
The prescaler effectively tells you how many instructions can be executed between TMR0 tics so at 1:32 it equates to 32 instructions. The whole of my PIC program is 163 instructions (163 12bit bytes). We wait for 125 lots of 32 instructions before we increment the 4ms counter and move onto the next digit. What I am trying to point out here is that TMR0 may have ticked over a few times before you reach the checking loop.
One last timing issue is how to check for the clock-set button being pressed. This also needs to be done between each digit and allow the minutes to incremented reasonable quickly to set the time. This can be done by checking bit 5 of the 4ms counter, if set then check the input line and if that's set then increment the minutes.
Here some of the timing code that sits between each digit being displayed to show you how I've done it:
; time synchronisation
wait movf TMR0,W ; get timer 4MHz/4cy/32 = 32us
xorlw .125 ; compare with 125 x 32us = 4ms
btfss STATUS,Z ; if not equal
goto wait ; then continue waiting
; If TMR0 register is written, the increment is inhibited for the
; following two cycles. The user can work around this by writing
; an adjusted value to the TMR0 register.
; increment 4ms counter
movlw 8 ; advance 8x32us to allow for TMR0 reset
movwf TMR0 ; reset TMR0 with adjusted value
incf CNT1 ; increment 4ms timer
; check for clock set
clkset btfss CNT1,5 ; check every time bit 5 goes hi
goto incsec ; if not set goto incsec
movf PORTB,W ; Get input from PORTB
andlw b'001000' ; Line high?
btfss STATUS,Z ; If not -- active low
goto incsec ; got incsec
incf MINUTE ; increment minute
clrf SECOND ; reset seconds to zero
clrf CNT1 ; clear 4ms counter
goto lomin ; go check the minutes
; increment seconds
incsec movf CNT1,W ; get 4ms counter
xorlw .250 ; compare with 250
btfss STATUS,Z ; if not equal
goto check ; goto check
incf SECOND ; else increment second
clrf CNT1 ; reset 8ms timer
; check time
check movf SECOND,W ; get seconds.
xorlw .60 ; compare with 60.
btfss STATUS,Z ; if not
goto lomin ; goto lomin,
incf MINUTE ; else increment minutes.
clrf SECOND ; clear seconds.
;work out new time
lomin
The breadboard layout looks like this:
Saturday, 11 February 2012
30. Christmas Lights with Transistors
A component I haven't used yet: The Transistor.
I had some battery operated Christmas lights. They were static, always on, with red, green, orange and blue LEDs.
I wondered if I could make them flash. As it turns out they were wired into two groups, red/orange and green/blue. At one end they were connect all together at the positive terminal and at the other end they two groups each connected to a resistor and the negative terminal. As this was all wound up in plastic sheath I would probably have damaged it trying to separate all the wires, so I left it as it was and went with the two grouped colours.
Now as the red/orange and green/blue were connect to the negative terminal via a resistor each, this meant they were outputs, that is +5---LED---Resistor---GND.
In order to program a PIC chip to control them I needed an input. This was not going to work, so I figured I could use an NPN Transistor to act as a switch.
I programmed a PIC12F508 to connect to pins to two transistors to switch the LEDs on and off. I also incorporated a 4-gang DIP switch to allow 16 flashing modes. I ended up just having Switch 1 as a fast/slow option, switches 2 & 3 to give 4 flashing modes and switch 4 enables the original static always on mode.
Here's my breadboard layout before I soldered it all together and put it into battery compartment and put a USB cable to provide +5V power instead of 4.5V with batteries.
I had some battery operated Christmas lights. They were static, always on, with red, green, orange and blue LEDs.
I wondered if I could make them flash. As it turns out they were wired into two groups, red/orange and green/blue. At one end they were connect all together at the positive terminal and at the other end they two groups each connected to a resistor and the negative terminal. As this was all wound up in plastic sheath I would probably have damaged it trying to separate all the wires, so I left it as it was and went with the two grouped colours.
Now as the red/orange and green/blue were connect to the negative terminal via a resistor each, this meant they were outputs, that is +5---LED---Resistor---GND.
In order to program a PIC chip to control them I needed an input. This was not going to work, so I figured I could use an NPN Transistor to act as a switch.
I programmed a PIC12F508 to connect to pins to two transistors to switch the LEDs on and off. I also incorporated a 4-gang DIP switch to allow 16 flashing modes. I ended up just having Switch 1 as a fast/slow option, switches 2 & 3 to give 4 flashing modes and switch 4 enables the original static always on mode.
Here's my breadboard layout before I soldered it all together and put it into battery compartment and put a USB cable to provide +5V power instead of 4.5V with batteries.
Sunday, 23 October 2011
29. Manual Up/Down Counter
I modified the circuit in the previous post by removing the 555 timer clock input and adding two switches so I could manually increment or decrement the value. These sent a signal to a 556 Timer chip (dual 555s) setup in monostable fashion to send a distinct pulse to the "clock-up/down" signals of the 74193. I also wired the "borrow" output of the first 74193 to the "clock-down" input of the second 74193 so it could count backwards. As inactive inputs to the clock up/down should be high when not in use I sent the 556 outputs via a 7404 hex inverter.
On the monostable circuits I used 8.2K resistors and a 10μF capacitors. I tried a 47μF capacitors but the pulse length was a little too long. With the 10μF capacitors I am getting the occasional double clock pulse, so it would sometimes skip 2 counts. I hooked up my oscilloscope and it looks like I have some noise on the output pulse when triggered. I'm not sure what's causing this so any ideas would be much appreciated.
Update: the circuit noise I have read is due to the switch contacts bouncing and to fix this I need a debouncing circuit.
On the monostable circuits I used 8.2K resistors and a 10μF capacitors. I tried a 47μF capacitors but the pulse length was a little too long. With the 10μF capacitors I am getting the occasional double clock pulse, so it would sometimes skip 2 counts. I hooked up my oscilloscope and it looks like I have some noise on the output pulse when triggered. I'm not sure what's causing this so any ideas would be much appreciated.
Update: the circuit noise I have read is due to the switch contacts bouncing and to fix this I need a debouncing circuit.
Thursday, 20 October 2011
28. Here are my 2 digits
Giving my PIC16F505s programmed as Hex-to-7-segment-display-drivers a work out by making a Hex Counter. I wanted to have 4 digits but the breadboard wasn't big enough. I might work on this later
For now, check out my little video:
27. Traffic Lights with PIC12F508s
I thought I'd have some fun with the PICs, so I made this 3 way traffic light system.
Pins:
1. +5V
2. Transmit
3. Receive
4. Master/Slave
5. Green
6. Amber
7. Red
8. Ground
PIC code can be found here.
Pins:
1. +5V
2. Transmit
3. Receive
4. Master/Slave
5. Green
6. Amber
7. Red
8. Ground
PIC code can be found here.
Friday, 7 October 2011
26. No Logic In using PICs
I considered using PIC chips for memory logic, so they could select whether an address was for RAM or ROM. Programmatically this is not a problem, the code can be written to do this quite easily. The problem is that they cant do it fast enough.
Most Z80 instructions work over 4 clock cycles, T1, T2, T3 and T4. During T1, the address pins A0-A15 are set to the value of PC (Program Counter) and half a cycle later, MREQ (Memory Request) and RD (Read) pins go active. By the end of T2 the data is fetched from the data bus on D0-D7.
If the Z80 is running at 1MHz then each cycle is 1μs (1 micro second), so fetching an instruction takes at most 2μs.
Now consider a PIC microcontroller running at 4MHz. Again each instruction takes 4 cycles, so the instruction to read the pins on a PIC such as MOVF GPIO,W will take 1μs (4Mhz / 4 cycles), so at most we could only perform 2 instructions on the PIC while the Z80 is trying to fetch the next instruction or operand on the data bus. A branch instruction on the PIC takes 8 cycles, so we could not even fit a loop into the time frame.
The only it could work with a PIC is if the Z80 was running at a much slower clock rate. However this Z80 can go at 2.5MHz and the Z80B can go at 4MHz, and it'd be a shame not to run at full speed.
You can clock some of the PICs with an external crystal to 20MHz and the more expensive PICS to 60MHz and this would allow 5 or 15 instructions in 1μs respectively, but probably still not fast enough at higher Z80 speeds.
Time to bring out the classic TTL chips.
Most Z80 instructions work over 4 clock cycles, T1, T2, T3 and T4. During T1, the address pins A0-A15 are set to the value of PC (Program Counter) and half a cycle later, MREQ (Memory Request) and RD (Read) pins go active. By the end of T2 the data is fetched from the data bus on D0-D7.
If the Z80 is running at 1MHz then each cycle is 1μs (1 micro second), so fetching an instruction takes at most 2μs.
Now consider a PIC microcontroller running at 4MHz. Again each instruction takes 4 cycles, so the instruction to read the pins on a PIC such as MOVF GPIO,W will take 1μs (4Mhz / 4 cycles), so at most we could only perform 2 instructions on the PIC while the Z80 is trying to fetch the next instruction or operand on the data bus. A branch instruction on the PIC takes 8 cycles, so we could not even fit a loop into the time frame.
The only it could work with a PIC is if the Z80 was running at a much slower clock rate. However this Z80 can go at 2.5MHz and the Z80B can go at 4MHz, and it'd be a shame not to run at full speed.
You can clock some of the PICs with an external crystal to 20MHz and the more expensive PICS to 60MHz and this would allow 5 or 15 instructions in 1μs respectively, but probably still not fast enough at higher Z80 speeds.
Time to bring out the classic TTL chips.
Saturday, 1 October 2011
25. Need a clock? Take your PIC!
Having discovered PIC microcontrollers, I think I will use them quite a lot on this project. One use is as a clock. The smaller PICs have 4MHZ internal oscillators and the larger ones I think are 8MHz. One of the pins can be configured to be a CLKOUTand will send a signal 1/4 of the clock speed. This is effectively 1 pulse for every instruction. Using the internal oscillator of 4MHz this should give a 1MHz clock signal.
I'm using one my PIC16F505s for this, although a PIC12F508 would be (a) cheaper and (b) has less pins [update: and it doesn't externalize its clock]. We only need to connect up +5V and ground, plus the clock pin. On the PIC16F505 its pin 3 (RB4/OSC2/CLKOUT).
The code would look like this:
I tried it on the Z80. I think it works. I measured it on my small oscilloscope but I don't think its fast enough to keep up with the signal change. Instead I measured the signal on the A15 pin. I did get a signal but there was a lot of noise when the pin went low. Its 4.705Hz, so multiply this by 65536 (the Z80 is executing NOP and the PC will loop every 65536 instructions) and then by 4 (number of clock signals to execute NOP) should give the clock speed. It gives 1,233,387.52, just slightly over 1MHz. Peak voltage is 2.040V, low is 0.480V. At this resolution I am not sure these voltages are accurate. I checked the MREQ pin and this looks like its working but the voltage delta is 800mV. Is this enough to give a true high/low difference? I'm not sure at this stage.
There was a wierd effect after a few mins where the higher address pins such as A15 seemed to be static rather than blinking. I put a decoupling capacitor (don't ask me why I just guessed), on the PIC chip and that seems to have solved the issue. Its been running for over an hour now and seems to be ok.
Time to see what else these babies can do...
I'm using one my PIC16F505s for this, although a PIC12F508 would be (a) cheaper and (b) has less pins [update: and it doesn't externalize its clock]. We only need to connect up +5V and ground, plus the clock pin. On the PIC16F505 its pin 3 (RB4/OSC2/CLKOUT).
The code would look like this:
include "p16f505.inc" ;
__config _IntRC_OSC_CLKOUTEN
org 000
loop nop
goto loop
end
I tried it on the Z80. I think it works. I measured it on my small oscilloscope but I don't think its fast enough to keep up with the signal change. Instead I measured the signal on the A15 pin. I did get a signal but there was a lot of noise when the pin went low. Its 4.705Hz, so multiply this by 65536 (the Z80 is executing NOP and the PC will loop every 65536 instructions) and then by 4 (number of clock signals to execute NOP) should give the clock speed. It gives 1,233,387.52, just slightly over 1MHz. Peak voltage is 2.040V, low is 0.480V. At this resolution I am not sure these voltages are accurate. I checked the MREQ pin and this looks like its working but the voltage delta is 800mV. Is this enough to give a true high/low difference? I'm not sure at this stage.
There was a wierd effect after a few mins where the higher address pins such as A15 seemed to be static rather than blinking. I put a decoupling capacitor (don't ask me why I just guessed), on the PIC chip and that seems to have solved the issue. Its been running for over an hour now and seems to be ok.
Time to see what else these babies can do...
Wednesday, 28 September 2011
24. Homebrew Hex to 7 segment display drivers working.
Yes I did it. I wrote PIC machine code to program the PIC16F505 Microcontrollers to perform the function of Hex to 7 segment Display Drivers.
I started writing the code before I even had the PIC Programmer or PIC chips. On the first run, I found I had an issue with the inputs not being grounded with pull-down resistors, causing the inputs to fluctuate randomly, but some 10K resistors on the inputs connected to ground sorted that. If you have a switch, when its on its fine, a voltage goes to set the pin high or 1. When the switch is off the pull-down resistors connect the pin to ground giving a low or 0 input.
I did initially opt to use one pin on the PIC16F505 as a latch, so it would only display the input when a button was pressed. I decided it wasn't necessary and the program loops around reading the inputs and setting the outputs to light up the LEDs.
Hers's a pic of the setup with annotation.
The PIC assembly code is here:
I started writing the code before I even had the PIC Programmer or PIC chips. On the first run, I found I had an issue with the inputs not being grounded with pull-down resistors, causing the inputs to fluctuate randomly, but some 10K resistors on the inputs connected to ground sorted that. If you have a switch, when its on its fine, a voltage goes to set the pin high or 1. When the switch is off the pull-down resistors connect the pin to ground giving a low or 0 input.
I did initially opt to use one pin on the PIC16F505 as a latch, so it would only display the input when a button was pressed. I decided it wasn't necessary and the program loops around reading the inputs and setting the outputs to light up the LEDs.
Hers's a pic of the setup with annotation.
; include file with config bit definitions include "p16f505.inc" ; ; config - enable internal OSC and allow use of RB4 ; - disable MCLRE and allow use of RB3 (input only) ; - disable Watchdog Timer, we don't use it. __config _IntRC_OSC_RB4EN & _MCLRE_OFF & _WDT_OFF ; local regsiters INB equ 0x08 INC equ 0x09
INPUT equ 0x0A
OUTB equ 0x0B OUTC equ 0x0C PWRSTS equ 0x0D
SEGDATA equ 0x10 SEG0 equ 0x10 SEG1 equ 0x11 SEG2 equ 0x12 SEG3 equ 0x13 SEG4 equ 0x14 SEG5 equ 0x15 SEG6 equ 0x16 SEG7 equ 0x17 SEG8 equ 0x18 SEG9 equ 0x19 SEGA equ 0x1A SEGB equ 0x1B SEGC equ 0x1C SEGD equ 0x1D SEGE equ 0x1E SEGF equ 0x1F ; start here org 000 movf STATUS,PWRSTS ; Save Power on status ; Port configuration ; a ; +-----+ --- ; VCC [| |] GND f| g |b ; D3 --> RB5 [| |] RB0 --> a --- ; D2 --> RB4 [| PIC |] RB1 --> b e| |c ; D1 --> RB3 [| 16F |] RB2 --> c --- ; D0 --> RC5 [| 505 |] RC0 --> d d ; NC RC4 [| |] RC1 --> e ; g <-- RC3 [| |] RC2 --> f ; +-----+ ; ; RRRRRR ; BBBBBB ; 543210 init movlw b'111000' ; Set PORTB Pins tris PORTB ; RRRRRR ; CCCCCC ; 543210 movlw b'100000' ; Set PORTC Pins tris PORTC ; Load Segment values into memory. ;Digit gfedcba abcdefg a b c d e f g ;0 0x3F 0x7E on on on on on on off ;1 0x06 0x30 off on on off off off off ;2 0x5B 0x6D on on off on on off on ;3 0x4F 0x79 on on on on off off on ;4 0x66 0x33 off on on off off on on ;5 0x6D 0x5B on off on on off on on ;6 0x7D 0x5F on off on on on on on ;7 0x07 0x70 on on on off off off off ;8 0x7F 0x7F on on on on on on on ;9 0x6F 0x7B on on on on off on on ;A 0x77 0x77 on on on off on on on ;b 0x7C 0x1F off off on on on on on ;C 0x39 0x4E on off off on on on off ;d 0x5E 0x3D off on on on on off on ;E 0x79 0x4F on off off on on on on ;F 0x71 0x47 on off off off on on on movlw 0x3F movwf SEG0 movlw 0x06 movwf SEG1 movlw 0x5B movwf SEG2 movlw 0x4F movwf SEG3 movlw 0x66 movwf SEG4 movlw 0x6D movwf SEG5 movlw 0x7D movwf SEG6 movlw 0x07 movwf SEG7 movlw 0x7F movwf SEG8 movlw 0x6F movwf SEG9 movlw 0x77 movwf SEGA movlw 0x7C movwf SEGB movlw 0x39 movwf SEGC movlw 0x5E movwf SEGD movlw 0x79 movwf SEGE movlw 0x71 movwf SEGF ; End of initialisation ; To here 37 Instructions @ 4MHz = 37uS ; Main Program Starts here. poweron clrf OUTB ; Clear output Register B clrf OUTC ; Clear output Register C btfss PWRSTS,RBWUF; Check Power-On Status goto display ; blank if power on ; Reset output values and indexes loop clrf OUTB ; Clear output Register B clrf OUTC ; Clear output Register C movlw SEGDATA ; Load W with SEG DATA base movwf FSR ; Save to FSR ; read value from PORTs movf PORTB,W ; Read PORTB
movwf INB ; Save PORTB
movf PORTC,W ; Read PORTC movwf INC ; Save PORTC ; combine port reads into a nibble in W register clrf INPUT ; Clear INPUT register btfsc INB,RB5 ; Test RB5 (D3) bsf INPUT,3 ; Set D0
btfsc INB,RB4 ; Test RB4 (D2) bsf INPUT,2 ; Set D1 btfsc INB,RB3 ; Test RB3 (D1) bsf INPUT,1 ; Set D2 btfsc INC,RC5 ; Test RC5 (D0) bsf INPUT,0 ; Set D3 movf INPUT,W ; Move value to W ; add value to index register and fetch segment value addwf FSR,F ; Add index to FSR pointer ; prepare register output bits btfsc INDF,0 ; Test for 'a' segment bsf OUTB,RB0 ; Set 'a' segment btfsc INDF,1 ; Test for 'b' segment bsf OUTB,RB1 ; Set 'b' segment btfsc INDF,2 ; Test for 'c' segment bsf OUTB,RB2 ; Set 'c' segment btfsc INDF,3 ; Test for 'd' segment bsf OUTC,RC0 ; Set 'd' segment btfsc INDF,4 ; Test for 'e' segment bsf OUTC,RB1 ; Set 'e' segment btfsc INDF,5 ; Test for 'f' segment bsf OUTC,RB2 ; Set 'f' segment btfsc INDF,6 ; Test for 'g' segment bsf OUTC,RB3 ; Set 'g' segment ; move output to ports display movf OUTB,W ; Get values to send to PORTB movwf PORTB ; Send to PORTB movf OUTC,W ; Get values to send to PORTC movwf PORTC ; Send to PORTC ; around again goto loop ; go back to loop - 50uS loop end
Friday, 23 September 2011
23. Put out by the output.
I had this idea, that I would connect up some 7 segment displays to show what all the registers where set to if I stepped through a Z80 program. Its a little bit ambitious at this stage of my journey, so I thought I would start by creating something to input Z80 commands directly onto the data bus. I bought some in-line 8 bit switches, however the data pins on the Z80 are split into two group by the fact that the +5V Vcc input sit between them. Not only that, they are not in order like the address pins. So I put some jump wires in to put them into the right order. Now it'd be great to have a hex display of the data that I am trying to put in, so I thought I could use two 7 segment displays. Easy right?
For each nibble (thats what 4 bits of a byte are called) I need a 7 segment display. One for the upper values of 0123456789ABCDEF and one for the lower. The displays have 8 inputs 7 for the segments and one for the decimal point. So I read that to convert 4 bits to 7 I needed a hex to 7 segment display driver. Cool, so I go surfing the web to find one. All I can can find are BCD to 7 segment display drivers (BCD is Binary Coded Decimal and basically allows the values 0123456789) such as the 7447. I eventually find some, the DM9368 and the MC14495. They don't make them any more, but if you hunt around you can find them for like £30 each.
Going back to my original idea of displaying the registers, I worked out I'd need 52. Ouch!
As I desperately try to find alternatives, one blogger mentions using a PIC microprocessor instead, and programming it to perform the same function. Hmm, could this work?
So I get diverted into looking at what these PIC things are. I soon discover that they're kind of like the ATMega that powers the Arduino, but can come in very small sizes, I mean some are only 8 pins. This diversion opens up a whole new world. New software, new machine code language, new software to program them and new programmers to, well, program them.
Needless to say, I have been reading numerous .pdf documents on how all this stuff works. I'm not even sure if it will work yet. I've initially plumbed for the PIC16F505. I was going to go with the PIC16C505 from Maplin for £1.89, but its a bit outdated, but the PIC16F505 is 79p from RS Components. Now it used to be that RS were only open to Businesses, but I believe they have now opened up their doors to the general public.
I found this USB PIC Programmer too for £35. So I am going to bite the bullet and give it a go because 79p x 52 is a lot easier to swallow. Of course I'll just try with 1 for now.
The software is free from Microchip and I've started writing some simple code so I can get the hang of it. At least its compiling ok.
So here I am programming a completely new and alien (to me) microprocessor so I can get some output (and input) from (to) a Z80 using some 7 segment displays. Kind of ironic really.
I may be a while....
For each nibble (thats what 4 bits of a byte are called) I need a 7 segment display. One for the upper values of 0123456789ABCDEF and one for the lower. The displays have 8 inputs 7 for the segments and one for the decimal point. So I read that to convert 4 bits to 7 I needed a hex to 7 segment display driver. Cool, so I go surfing the web to find one. All I can can find are BCD to 7 segment display drivers (BCD is Binary Coded Decimal and basically allows the values 0123456789) such as the 7447. I eventually find some, the DM9368 and the MC14495. They don't make them any more, but if you hunt around you can find them for like £30 each.
Going back to my original idea of displaying the registers, I worked out I'd need 52. Ouch!
As I desperately try to find alternatives, one blogger mentions using a PIC microprocessor instead, and programming it to perform the same function. Hmm, could this work?
So I get diverted into looking at what these PIC things are. I soon discover that they're kind of like the ATMega that powers the Arduino, but can come in very small sizes, I mean some are only 8 pins. This diversion opens up a whole new world. New software, new machine code language, new software to program them and new programmers to, well, program them.
Needless to say, I have been reading numerous .pdf documents on how all this stuff works. I'm not even sure if it will work yet. I've initially plumbed for the PIC16F505. I was going to go with the PIC16C505 from Maplin for £1.89, but its a bit outdated, but the PIC16F505 is 79p from RS Components. Now it used to be that RS were only open to Businesses, but I believe they have now opened up their doors to the general public.
I found this USB PIC Programmer too for £35. So I am going to bite the bullet and give it a go because 79p x 52 is a lot easier to swallow. Of course I'll just try with 1 for now.
The software is free from Microchip and I've started writing some simple code so I can get the hang of it. At least its compiling ok.
So here I am programming a completely new and alien (to me) microprocessor so I can get some output (and input) from (to) a Z80 using some 7 segment displays. Kind of ironic really.
I may be a while....
Wednesday, 7 September 2011
22. Building An EEPROM Programmer (Part 3).
Ok So does it actually work. YES!
On linux you can check the data in the zx81.rom file by typing:
Running the EERPROM Reader in Part 1, I can visually see that they look the same. As a final check I got the ERRPROM Reader to add all the bytes together (OK not the best way to check sum a file but I am not here to write a proper CRC checksum routine for the Arduino just now), and also wrote a C program to do the same on Linux called sum.c:
The final value came back as 855105 for both.
Result!
As a final check, I unplugged the Arduino removing power from the EEPROM in the process. Left it for a few minutes and then plugged that Arduino again restoring power to the EEPROM and reran the EEPROM Reader program. All data preserved and sum still the same.
On linux you can check the data in the zx81.rom file by typing:
od -Ax -t x1 zx81.rom
Running the EERPROM Reader in Part 1, I can visually see that they look the same. As a final check I got the ERRPROM Reader to add all the bytes together (OK not the best way to check sum a file but I am not here to write a proper CRC checksum routine for the Arduino just now), and also wrote a C program to do the same on Linux called sum.c:
#includemain() { int c,sum; sum=0; while ((c=getchar()) != EOF) { sum=sum+c; } printf("Checksum: %d\n",sum); }
The final value came back as 855105 for both.
Result!
As a final check, I unplugged the Arduino removing power from the EEPROM in the process. Left it for a few minutes and then plugged that Arduino again restoring power to the EEPROM and reran the EEPROM Reader program. All data preserved and sum still the same.
21. Building An EEPROM Programmer (Part 2).
The Arduino can receive data via the Serial interface. This is how I want to send the Z80 programs to the EEPROM. The problem is the Arduino is not reading fast enough and so what gets sent is lost. Its fine for sending the odd few bytes now and then, but (using my zx81.rom as a test) sending 8K of data is a bit much for it to handle in one go.
The Serial buffer on the Arduino is 128 bytes, so all I was getting to start with was the first 128 bytes of the 8K successfully, after that it was a random sets of 128 bytes from the Serial port that it grabbed hold of before the stream of data ended.
To compensate for this, I decided to send 64 bytes at a time with 1 second interval. Now this is fairly easy to do in Linux with a script:
eeprom_send.sh
To use it type:
But first you just need to program the Arduino and then open the serial monitor window (dont ask me why).
Here is the Arduino program:
The Serial buffer on the Arduino is 128 bytes, so all I was getting to start with was the first 128 bytes of the 8K successfully, after that it was a random sets of 128 bytes from the Serial port that it grabbed hold of before the stream of data ended.
To compensate for this, I decided to send 64 bytes at a time with 1 second interval. Now this is fairly easy to do in Linux with a script:
eeprom_send.sh
#!/bin/bash
split -C 64 ${1} ${1}.part.
for part in `ls ${1}.part.*`
do
cat ${part} >> ${2}
sleep 1
done
rm -f ${1}.part.*
To use it type:
./eeprom_send.sh zx81.rom /dev/ttyACM0
But first you just need to program the Arduino and then open the serial monitor window (dont ask me why).
Here is the Arduino program:
/*
EEPROM Programmer
*/
#define memsize 8192
int STS = 13; // Status Indicator
int AP[16] = {22,24,26,28,30,32,34,36,38,40,42,44,46,48,50,52};
int AD[16] = {0,0,0,0,0,0,0,0,0,0,0,0,0,0,0,0};
int DP[8] = {23,25,27,29,31,33,35,37};
int DD[8] = {0,0,0,0,0,0,0,0};
int CE = 4;
int OE = 3;
int WE = 2;
int i;
int A;
int D;
int wait;
void setup() {
Serial.begin(115200);
Serial.flush();
pinMode(STS, OUTPUT);
// Setup Address Pins
for (i=0;i<16;i++) {
pinMode(AP[i],OUTPUT);
}
// Setup Data Pins
for (i=0;i<8;i++) {
pinMode(DP[i],OUTPUT);
}
// Setup Control Pins
pinMode(CE, OUTPUT);
pinMode(WE, OUTPUT);
pinMode(OE, OUTPUT);
// Setup Chip
digitalWrite(CE, LOW);
digitalWrite(WE, LOW);
digitalWrite(OE, HIGH);
Serial.println("Waiting for Data...");
while(Serial.available()==0) {
digitalWrite(STS,LOW);
delay(100);
digitalWrite(STS,HIGH);
delay(100);
}
for (A=0;A<memsize;A++) {
D=Serial.read();
digitalWrite(STS,HIGH); //Signal that we're writing.
// Setup Address Pins
for (i=0;i<16;i++) {
if((A&bit(i))>0) {
AD[i]=HIGH;
} else {
AD[i]=LOW;
}
digitalWrite(AP[i],AD[i]);
}
delay(1);
digitalWrite(OE,LOW); // Reads Disabled
delay(1);
digitalWrite(CE,HIGH); // Chip Enable
delay(1);
digitalWrite(WE,HIGH); // Write Enabled
delay(1);
// Setup Data Pins
for (i=0;i<8;i++) {
if((D&bit(i))>0) {
DD[i]=HIGH;
} else {
DD[i]=LOW;
}
digitalWrite(DP[i],DD[i]);
}
delay(1);
digitalWrite(WE,LOW); // Write Disabled
delay(1);
digitalWrite(CE,LOW); // Chip Disabled
delay(1);
digitalWrite(OE,HIGH); // Reads Enabled
delay(1);
digitalWrite(STS,LOW); // Signal that we're waiting
wait=0;
while(Serial.available()==0) {
delay(1);
if (wait>2000) {
A=memsize;
break;
}
wait++;
}
}
}
void loop() {
digitalWrite(STS, HIGH); // set the LED on
delay(1000); // wait for a second
digitalWrite(STS, LOW); // set the LED off
delay(1000); // wait for a second
}
Tuesday, 6 September 2011
20. Building An EEPROM Programmer (Part 1).
Please note that I have disabled comments on this post purely due to a persistent spammer - Dave 23/04/2021.
Its all very well having an EEPROM chip to store our program for the Z80, but somehow we need to get the code onto it. Enter, the EEPROM programmer. So far I have wired up the EEPROM to the Arduino Mega and I can read from it successfully. Writing to it is easy enough, but just now I can't bulk load a file to it. When I do, go find Part 2 :)Here's a diagram I made using this great tool called Fritizing:
As you can see I've used a 74LS04 Hex Inverter to make sure the 3 control lines are HIGH by default as the pins on the Arduino are LOW by default and as the control pins are 'Active Low' we don't want data overwritten accidentally. It also means that setting the pin to HIGH in the Arduino code means the pin is Active.
Here's the EEPROM Reader code for the Arduino Mega:
/*
EEPROM Chip Reader
*/
#define memsize 8192
int STS = 13; // Status Indicator
int AP[16] = {22,24,26,28,30,32,34,36,38,40,42,44,46,48,50,52};
int AD[16] = {0,0,0,0,0,0,0,0,0,0,0,0,0,0,0,0};
int DP[8] = {23,25,27,29,31,33,35,37};
int DD[8] = {0,0,0,0,0,0,0,0};
int CE = 4;
int OE = 3;
int WE = 2;
int i;
int j;
int D;
int A;
void setup() {
// Setup Control Pins
pinMode(CE, OUTPUT);
pinMode(WE, OUTPUT);
pinMode(OE, OUTPUT);
// Disable Chip, and disable read and write.
digitalWrite(CE, LOW);
digitalWrite(WE, LOW);
digitalWrite(OE, LOW);
Serial.begin(115200);
Serial.println("Reading EEPROM...");
pinMode(STS, OUTPUT);
digitalWrite(STS,HIGH);
// Setup Address Pins
for (i=0;i<16;i++) {
pinMode(AP[i],OUTPUT);
}
// Setup Data Pins
for (i=0;i<8;i++) {
pinMode(DP[i],INPUT);
}
delay(1000);
for (A=0;A<memsize;) {
if (A<4096) Serial.print("0");
if (A<256) Serial.print("0");
if (A<16) Serial.print("0");
Serial.print(A,HEX);
Serial.print(" ");
for (j=0;j<16;j++) {
// Setup Address Pins
for (i=0;i<16;i++) {
if((A&bit(i))>0) {
AD[i]=HIGH;
} else {
AD[i]=LOW;
}
digitalWrite(AP[i],AD[i]);
}
digitalWrite(CE,HIGH); // Chip Enabled
digitalWrite(OE,HIGH); // Read Enabled
// Read Data Pins
D=0;
for (i=0;i<8;i++) {
DD[i]=digitalRead(DP[i]);
D=D+bit(i)*DD[i];
}
digitalWrite(OE,LOW); // Read Disabled
digitalWrite(CE,LOW); // Chip Disabled
if (D<16) Serial.print("0");
Serial.print(D,HEX);
Serial.print(" ");
A++;
}
Serial.println();
}
}
void loop() {
digitalWrite(STS, HIGH); // set the LED on
delay(500); // wait for a second
digitalWrite(STS, LOW); // set the LED off
delay(500); // wait for a second
}
Wednesday, 31 August 2011
19. The Ups and Downs of an Astable 555 Timer (How fast will it go?)
Well not that fast really. OK its faster than the refresh rate on your TV, but in the grand scheme of the computer world, its not that fast at all. Now I did get it to clock up 250KHz but the problem is that the peak voltage was not high enough and the low voltage not low enough. Its seems the faster I tried to get it to go the smaller the voltage difference.
Measuring the signal with the Xprotolab Oscilloscope is not easy either. It has a minimum resolution of 500 nano seconds per pixel, which if you do the sum 1/0.0000005 = 2MHz, means a 250KHz signal is 8 pixels wide. At higher frequencies the signal starts to become a blur on the screen.
Another aspect of the astable 555 timer is the Duty Cycle. Ideally, you probably want the time the voltage is high to be the same as when it is low, e.g. 50% each. The main external components used are 2 resistors (R1 & R2) and a capacitor (C1). Using 2 identical resistors gives you a Duty Cycle of 66%. To achive a Duty Cycle of 50% R2 needs to be roughly 10x that of R1. So with 2x 1K resistors and a 1nF capacitor we get about 250KHz with a 66% Duty Cycle, but changing R2 for a 10K resistor gets a 52% Duty Cycle and a much reduced clock speed of 57KHz. However, the low volatge is 0.000V and the peak is 4.480V using a 5V supply, much more usable. The Z80 Datasheet says that the input voltage for CLK should be Vcc-0.6 minimum, which with a 5V supply is 4.4V, so 4.480V should be OK to drive the clock signal.
Here are a few screenshots to show what I am talking about:
R1=1K R2=1K C1=1nF ~ Vmax=4.160V Vmin=1.600V Freq=250KHz Duty=66%
R1=1K R2=1K C1=10nF ~ Vmax=4.480V Vmin=0.000V Freq=42.55KHz Duty=66%
R1=1K R2=10K C1=1nF ~ Vmax=4.480V Vmin=0.000V Freq=58.82KHz Duty=52%
If I want to run this faster I am going to have to buy a quartz crystal. For this standard Z80 it needs to be 2.5MHz. (The Z80A will go at 4MHz).
Measuring the signal with the Xprotolab Oscilloscope is not easy either. It has a minimum resolution of 500 nano seconds per pixel, which if you do the sum 1/0.0000005 = 2MHz, means a 250KHz signal is 8 pixels wide. At higher frequencies the signal starts to become a blur on the screen.
Another aspect of the astable 555 timer is the Duty Cycle. Ideally, you probably want the time the voltage is high to be the same as when it is low, e.g. 50% each. The main external components used are 2 resistors (R1 & R2) and a capacitor (C1). Using 2 identical resistors gives you a Duty Cycle of 66%. To achive a Duty Cycle of 50% R2 needs to be roughly 10x that of R1. So with 2x 1K resistors and a 1nF capacitor we get about 250KHz with a 66% Duty Cycle, but changing R2 for a 10K resistor gets a 52% Duty Cycle and a much reduced clock speed of 57KHz. However, the low volatge is 0.000V and the peak is 4.480V using a 5V supply, much more usable. The Z80 Datasheet says that the input voltage for CLK should be Vcc-0.6 minimum, which with a 5V supply is 4.4V, so 4.480V should be OK to drive the clock signal.
Here are a few screenshots to show what I am talking about:
R1=1K R2=1K C1=1nF ~ Vmax=4.160V Vmin=1.600V Freq=250KHz Duty=66%
R1=1K R2=1K C1=10nF ~ Vmax=4.480V Vmin=0.000V Freq=42.55KHz Duty=66%
R1=1K R2=10K C1=1nF ~ Vmax=4.480V Vmin=0.000V Freq=58.82KHz Duty=52%
If I want to run this faster I am going to have to buy a quartz crystal. For this standard Z80 it needs to be 2.5MHz. (The Z80A will go at 4MHz).
18. Pinups! Oops! I mean Pinouts :)
I was trying to visualise the connections between the main ICs for my little project. Specifically the address bus pins(A0 to A15) and the data bus (D0 to D7). Looking at 3 .pdf datasheets did not help and what I really wanted was a side by side picture. So I started up Microsoft Paint and started making some of my own images, and here they are:
The Z80, the 128k SRAM and the 8K EEPROM.
Friday, 26 August 2011
17. Old Timer
Thinking about what to use as a clock source to tick over the Z80, I remembered I had a couple of 555 timers. These have been around since 1971 and not much has changed. There are several modes you can operate these 555s but I am going to get it to generate a squarish pulse using the 'astable' confuration. You can read up about how to do that elsewhere on the web. Suffice to say I'm using 2x 1k resistors and a 10nF capacitor. Hook these up to the 555 and you get a pusle from pin 3. Yay!
Here a pic of the setup:
Now to measure the pulse we have produced. The Xprotolab Oscilloscope comes into it own here. I connect pin3 from the 555 to the CH1 input. It seems we have a pulse operating at 42.55KHz. Ok its not the speediest rate to run a Z80 at but it'll do to start with.
Here's the output from the oscilloscope:
There is formula for working out what combination of resistors and capacitor give a particular frequency, however, as I found out using resistors of too low a value gave a very weak pulse, ie the high voltage was not enough to trigger a response on the CLK input to the Z80. However, just changing the capacitor and keeping the 1K resistors, does allow you to adjust the frequency. Changing it to a 470uF almost gets you a 1 seconds pulse. Its slightly over, and it does also depend on the tolerance of the resistors, but its close enough. This lead me to ponder if there was such a thing as a variable capacitor, and then I remembered from my Denshi Block days that is what was inside the tuner. With something like that we could have a variable speed computer. Something to look at later.
Here a pic of the setup:
Now to measure the pulse we have produced. The Xprotolab Oscilloscope comes into it own here. I connect pin3 from the 555 to the CH1 input. It seems we have a pulse operating at 42.55KHz. Ok its not the speediest rate to run a Z80 at but it'll do to start with.
Here's the output from the oscilloscope:
There is formula for working out what combination of resistors and capacitor give a particular frequency, however, as I found out using resistors of too low a value gave a very weak pulse, ie the high voltage was not enough to trigger a response on the CLK input to the Z80. However, just changing the capacitor and keeping the 1K resistors, does allow you to adjust the frequency. Changing it to a 470uF almost gets you a 1 seconds pulse. Its slightly over, and it does also depend on the tolerance of the resistors, but its close enough. This lead me to ponder if there was such a thing as a variable capacitor, and then I remembered from my Denshi Block days that is what was inside the tuner. With something like that we could have a variable speed computer. Something to look at later.
16. Serial Killer App.
I got the USB to UART device yesterday. Works a treat. I'm glad I didn't decide to make my own, the CP2102 is so small the soldering would have been a nightmare. Although it did come with drivers for Windows, I don't have any File Transfer over Serial Port Software, but Linux does.
I downloaded the capture.sh script from www.gabotronics.com and installed the following package:
I then ran capture.sh and it transfered a screenshot of the Xprotolab Oscilloscope:
It comes out black on white, so a little bit of image conversion:
Now there is an interface that is in development for the PC using the same Serial connection. it still needs a bit of work, but so far its looking good. Check it out at http://www.gabotronics.com/product-info/xprotolab-pc-interface.htm
However for now, I'm happy with the screenshots from the oscilloscope. :D
I downloaded the capture.sh script from www.gabotronics.com and installed the following package:
sudo apt-get install -y lrzsz
I then ran capture.sh and it transfered a screenshot of the Xprotolab Oscilloscope:
It comes out black on white, so a little bit of image conversion:
convert -negate a.bmp b.bmpand hey presto:
Now there is an interface that is in development for the PC using the same Serial connection. it still needs a bit of work, but so far its looking good. Check it out at http://www.gabotronics.com/product-info/xprotolab-pc-interface.htm
However for now, I'm happy with the screenshots from the oscilloscope. :D
Tuesday, 23 August 2011
15. USB connector for the XProtolab
The micro USB port on the Xprotolab is actually a serial port with a USB connector. Connecting it up to the USB port on the PC gives power, but thats it. In order to use the serial port capabilities you need to have some hardware in between so that when you plug into the USB on the PC it thinks its a COM port.
Now in America, you can buy a cable from Gabotronics, however their distributor in the UK doesn't stock it. However Gabotronics do tell you how to connect one up... to a CP2102. Its a small chip. Fiddly soldering. But wait, there is something I can buy that will get me most of the way: TRIXES USB 2.0 To TTL Serial Converter from Play.com For £4.24 including shipping, I cant refuse. A CP2102 chip from Farnells cost £4.44+VAT.
All I need now is an old micro USB cable to dissect to connect to the Serial Converter.
Why do I want to do this anyway? Well they are designing an interface for the PC to communicate with the Xprotolab and you can also get screenshots (aparently). We'll see.
Another parcel coming then, its Christmas again :)
Now in America, you can buy a cable from Gabotronics, however their distributor in the UK doesn't stock it. However Gabotronics do tell you how to connect one up... to a CP2102. Its a small chip. Fiddly soldering. But wait, there is something I can buy that will get me most of the way: TRIXES USB 2.0 To TTL Serial Converter from Play.com For £4.24 including shipping, I cant refuse. A CP2102 chip from Farnells cost £4.44+VAT.
All I need now is an old micro USB cable to dissect to connect to the Serial Converter.
Why do I want to do this anyway? Well they are designing an interface for the PC to communicate with the Xprotolab and you can also get screenshots (aparently). We'll see.
Another parcel coming then, its Christmas again :)
14. Goodies Received.
I got the oscilloscope and the Ardunio board yesterday. I should have gotten them Saturday but I was out when the postman came so had to wait for the Post Office depot to open at 7am Monday.
Not much to say about the Arduino except, its bigger, has more pins and will allow me to connect up the whole of the Z80, the SRAM and EEPROM chips.
The oscilloscope is amazing! It's so small but full of features, and despite the small display is actually very readable.
Heres a pic of them both:

Not much to say about the Arduino except, its bigger, has more pins and will allow me to connect up the whole of the Z80, the SRAM and EEPROM chips.
The oscilloscope is amazing! It's so small but full of features, and despite the small display is actually very readable.
Heres a pic of them both:
Friday, 19 August 2011
1101. Retail Therapy.
I bought some goodies from Cool Components.
The Arduino Mega 2560 and the XMega XProtolab Oscilloscope.
The bigger Arduino gives me more connections for communicating with the Z80, the SRAM and the EEPROM. The oscilloscope means I can test and check my circuits are working such as a clock circuit running at 1MHz.
Its like Christmas :)
The Arduino Mega 2560 and the XMega XProtolab Oscilloscope.
The bigger Arduino gives me more connections for communicating with the Z80, the SRAM and the EEPROM. The oscilloscope means I can test and check my circuits are working such as a clock circuit running at 1MHz.
Its like Christmas :)
Tuesday, 16 August 2011
12. Resistance Is Futile.
I have a whole stash of resistors from a kit. They're on strips and none of them are labelled. Well of course they are labelled but with 5 coloured lines around them. Great, now I can work out what they are, or so I thought. Even with an online resistor calculator I can't tell for sure. Some of the colours are a bit vague, or maybe its just my eyesight going. Is that a brown or a gold, is that red a shade of blue?
Anyway, I found a better way of identifying them. I just used an Ohmmeter to measure their resistance. Simples.
Now for a little chant: Ohm, Ohm, Ohm, Ohm....
Anyway, I found a better way of identifying them. I just used an Ohmmeter to measure their resistance. Simples.
Now for a little chant: Ohm, Ohm, Ohm, Ohm....
Sunday, 14 August 2011
11. Fried chips? Well just an LED so far...
Well it was bound to happen sooner or later. I fried an LED.
Maplin is open on Sundays, so I popped over to get some of those components to make a 5 volt power supply.
It worked. I put a red LED on the +5v coming from the circuit and connected the other end to ground. It lit up, for a while. I noticed this smell of hot electronics then the LED faded away. The bulb was hot, the voltage regulator (78L05) was hot. Not good!
So I rememeber reading somewhere, always use a resistor with an LED. So I put a 1K resistor in front and then found another LED and it was fine. Not hot anywhere.
Here is a diagram I made using CircuitMaker Student Edition which was free to download:
Maplin is open on Sundays, so I popped over to get some of those components to make a 5 volt power supply.
It worked. I put a red LED on the +5v coming from the circuit and connected the other end to ground. It lit up, for a while. I noticed this smell of hot electronics then the LED faded away. The bulb was hot, the voltage regulator (78L05) was hot. Not good!
So I rememeber reading somewhere, always use a resistor with an LED. So I put a 1K resistor in front and then found another LED and it was fine. Not hot anywhere.
Here is a diagram I made using CircuitMaker Student Edition which was free to download:
Saturday, 13 August 2011
10. Oh! The Power...
A thought occurred to me. So far I've been using the Arduino to supply power to the Z80 and other ICs (Integrated Circuits aka chips). This can't be the case in the long run. I either need to use a battery or a some mains power adapter.
Now a battery would be good, but what to use. I need 5 volts. If I use 3 AA or AAA batteries, they are 1.5 volts each and thats only 4.5 volts altogether. Add a fourth and I get 6 volts. Too much. So I search the web and find I need something called a Voltage Regulator, but which one? Further reading says I could use a 7805. This will convert much higher voltages to 5v the (the 05 in the 7805 gives us a clue here it seems). Reading further tells me ideally a voltage 2-3 volts higher on the input would be preferable so an 8 volt battery? Hmm, lets go with a 9 volt PPV battery.
The 7805 comes in a few flavours, such as 78L05, 78M05 and 78S05. The L model give 0.1 Amps of current output, the M 0.5 Amps and the S 2.0 Amps. There are others, but its important to choose one that has enough power to drive the circuitry. At this stage I'm not sure. I need to look at the datasheets for ICs I already have to see what range current is expected. I expect it will be either L or M. Anything higher and I think higher and I think I'd fry the circuits.
There is also the implementation of the Voltage Regulator in the circuit that need some thought. It seems we need to put capacitors either side of the voltage regulator to stop it fluctuating too much and for safety a diode to stop us from blowing things up by connecting the battery up the wrong way. This article has a diagram on how to connect it up: http://stuff.nekhbet.ro/2006/06/18/how-to-build-a-5v-regulator-using-78l05-7805.html
I need some more components!
Now a battery would be good, but what to use. I need 5 volts. If I use 3 AA or AAA batteries, they are 1.5 volts each and thats only 4.5 volts altogether. Add a fourth and I get 6 volts. Too much. So I search the web and find I need something called a Voltage Regulator, but which one? Further reading says I could use a 7805. This will convert much higher voltages to 5v the (the 05 in the 7805 gives us a clue here it seems). Reading further tells me ideally a voltage 2-3 volts higher on the input would be preferable so an 8 volt battery? Hmm, lets go with a 9 volt PPV battery.
The 7805 comes in a few flavours, such as 78L05, 78M05 and 78S05. The L model give 0.1 Amps of current output, the M 0.5 Amps and the S 2.0 Amps. There are others, but its important to choose one that has enough power to drive the circuitry. At this stage I'm not sure. I need to look at the datasheets for ICs I already have to see what range current is expected. I expect it will be either L or M. Anything higher and I think higher and I think I'd fry the circuits.
There is also the implementation of the Voltage Regulator in the circuit that need some thought. It seems we need to put capacitors either side of the voltage regulator to stop it fluctuating too much and for safety a diode to stop us from blowing things up by connecting the battery up the wrong way. This article has a diagram on how to connect it up: http://stuff.nekhbet.ro/2006/06/18/how-to-build-a-5v-regulator-using-78l05-7805.html
I need some more components!
9. The Memory LOW down.
One thing to watch out for when connecting the Arduino to things like memory chips is that by default all the Arduino pins are LOW. Now considering that connections on the memory chips like WE (write enable) and CE (chip enable) are "active Low", then they will be active when a new program is loaded into the Arduino. This means you could overwrite your memory inadvertently. Most likely you will write the value 0 to the address 0 since all the data and address lines will probably be low.
Of course I am talking from experience here as this is exactly what happended to me when I was playing with the SRAM chip. I wrote 2 programs, one called SRAM_Writer and one called SRAM_Reader. I initially ran the Writer and then the Reader. Everything read back OK except memory address 0 which was 0 and my Writer program had written a value of 3 to it.
For safety, best to use some inverters like the 7404s on the critial connections so that they will be HIGH when the Arduino starts up.
Of course I am talking from experience here as this is exactly what happended to me when I was playing with the SRAM chip. I wrote 2 programs, one called SRAM_Writer and one called SRAM_Reader. I initially ran the Writer and then the Reader. Everything read back OK except memory address 0 which was 0 and my Writer program had written a value of 3 to it.
For safety, best to use some inverters like the 7404s on the critial connections so that they will be HIGH when the Arduino starts up.
Friday, 12 August 2011
8. SRAM Working.
I managed to get the SRAM chip working. I only have a limited number of pins on the Arduino and I needed 4 just to control the chip. I decided to use 3 pins for the address lines and 3 more pins for the data lines. All other pins on the chip I connected to ground effectively making them low or 0. With this configuration I can read/write the values 0 to 7 to the memory addresses 0 to 7 because 7 is the biggest value you can make with 3 binary digits 111 = 1x4 + 1x2 + 1x1 = 7.
There are 17 address lines on this SRAM chip I'm using labelled A0 through to A16 and that allows 217 memory addresses which is 131072 or 128K. In today's world this is an insignificant amount of RAM, but to put it into perspective, the Sinclair ZX80 had 1K of RAM and a 4K ROM, the ZX81 had 1K RAM and an 8K ROM, the Spectrum had 48K of RAM and a 16K ROM.
Wednesday, 10 August 2011
7. Writing machine code.
It would be fair to say that you can't talk to the Z80 in English, or any other language come to that. It will however accept an 8 bit byte with a value in the range from 0 to 255 or 00 to FF in hexidecimal ( I wont explain how to convert decimal into hex or visa versa, suffice to say your PC's calculator program should be able to do it if you're interested).
If I put 00 on the data lines (basically I grounded them all for now so they are always set at 00) when the Z80 fetches the next instruction, it will read 00 and execute the NOP (No Operation) instruction, and do nothing. This is a valid instruction for the Z80. As each instruction byte takes 4 clock tics to process, a processor running at 1MHz will take 4us (4 micro seconds) to do nothing. This is very useful for timing, because like in the real world when you're waiting for something to happen, you might just sit there and do nothing.
Anyway, it not easy knowing all the values of all the commands, its much easier to know an instruction by name such as NOP.
Consider the following Z80 program:
This converts into the following values in hex machine code:
If I put 00 on the data lines (basically I grounded them all for now so they are always set at 00) when the Z80 fetches the next instruction, it will read 00 and execute the NOP (No Operation) instruction, and do nothing. This is a valid instruction for the Z80. As each instruction byte takes 4 clock tics to process, a processor running at 1MHz will take 4us (4 micro seconds) to do nothing. This is very useful for timing, because like in the real world when you're waiting for something to happen, you might just sit there and do nothing.
Anyway, it not easy knowing all the values of all the commands, its much easier to know an instruction by name such as NOP.
Consider the following Z80 program:
LD A,1 ; Load A with 1 LD B,2 ; Load B with 2 ADD A,B ; Add B to A HALT ; Stop
This converts into the following values in hex machine code:
3E 01 ; Load A with 1 06 02 ; Load B with 2 80 ; Add B to A 76 ; StopNow as you can see the program was easier to understand than the 6 bytes that the Z80 needs to receive to make it happen. What we need is something that will assemble the bytes from the written commands. As it happens there is a Z80 Assembler program called z80asm which will do it for you. So this is what I am going to use to create the bytes that I will store in the EEPROM to instruct the Z80 what to do.
6. Memories
Well a CPU is not much good unless you can send instructions to it. They have to be stored somewhere, so you need memory. Now there are various types of memory chip and the most common types are RAM (Random Access Memory) which is fast, but forgets everything once power is switched off, and ROM (Read Only Memory) which keeps it contents after power down.
RAM is good for storing all things that change such as calculation results, the current colour of a pixel on the screen, the location of your pieces in a chess game. There are many uses. ROM on the other hand is fixed. The BIOS which is the program that initially starts your PC is stored on a ROM. It never changes. It can't change, and this makes it difficult to use in an experimental way because like CDs, once written at the factory, they can't be overwritten. We could use a PROM (Programmable Read Only Memory), but this is like a CD-R once you've finished writing to it, you can't overwrite or erase it either. There are EPROMS (Erasble Programmable Read Only Memories) but tend to need ultraviolet light to shine on them to erase them, hardly convenient. There is a better solution EEPROMS (Electrically Erasable Programmable Read Only Memories)
There is also a kind of half way house with SRAM (Static Random Access Memory) which is like RAM but will remember everything if you keep a low voltage applied as used by the BIOS to store settings and backed up with something like a CR2032 battery for when the power is switched off. They last for several years.
For my computer I am going to use an SRAM and EEPROM , which will effectively be my RAM and ROM.
The Z80 has 16 lines for addressing memories and 8 lines for the data. Back in the 80s, memories with similar pins were abundant but these days you have to go and hunt for them. I found some at Farnell's, it came to about £10 but I couldn't order with a credit card unless I bought £20 (pre VAT) worth of good, so I got 35 of each Red, Green and Yellow LEDs. The order arrived today - yay.
I got the ALLIANCE MEMORY AS6C1008-55PCN - SRAM and the ATMEL - AT28C64B-15PU - EEPROM. Need to read the data sheets and understand how they work so it'll be a while before I get going with these yet. The Arduino will help.
RAM is good for storing all things that change such as calculation results, the current colour of a pixel on the screen, the location of your pieces in a chess game. There are many uses. ROM on the other hand is fixed. The BIOS which is the program that initially starts your PC is stored on a ROM. It never changes. It can't change, and this makes it difficult to use in an experimental way because like CDs, once written at the factory, they can't be overwritten. We could use a PROM (Programmable Read Only Memory), but this is like a CD-R once you've finished writing to it, you can't overwrite or erase it either. There are EPROMS (Erasble Programmable Read Only Memories) but tend to need ultraviolet light to shine on them to erase them, hardly convenient. There is a better solution EEPROMS (Electrically Erasable Programmable Read Only Memories)
There is also a kind of half way house with SRAM (Static Random Access Memory) which is like RAM but will remember everything if you keep a low voltage applied as used by the BIOS to store settings and backed up with something like a CR2032 battery for when the power is switched off. They last for several years.
For my computer I am going to use an SRAM and EEPROM , which will effectively be my RAM and ROM.
The Z80 has 16 lines for addressing memories and 8 lines for the data. Back in the 80s, memories with similar pins were abundant but these days you have to go and hunt for them. I found some at Farnell's, it came to about £10 but I couldn't order with a credit card unless I bought £20 (pre VAT) worth of good, so I got 35 of each Red, Green and Yellow LEDs. The order arrived today - yay.
I got the ALLIANCE MEMORY AS6C1008-55PCN - SRAM and the ATMEL - AT28C64B-15PU - EEPROM. Need to read the data sheets and understand how they work so it'll be a while before I get going with these yet. The Arduino will help.
5. Here's one I made earlier...
I bought a breadboard from Maplin and some jump wires and put the ICs (intergrated circuits, that'll be the computer chips then), and some LEDs to the address pins of the Z80 and a bright blue LED on the clock. I did try initially putting the blue LED in-line but for some reason it wouldn't light up so I assumed it didnt have enough power to drive it (it was a HIGH line state before going into the inverter) , so I took a feed off the 'active low' state of the CLK signal from the 74LS04 and fed it back in and inverted the signal again and then connected the blue LED to that and it lit up like a dream. The hex inverters also have their own power supply and can boost a signal coming in. I think they're also known as 'buffers'.
Anyway, here it is all wired up ready to go:
This is the Arduino program I wrote to talk to the Z80:
Anyway, here it is all wired up ready to go:
This is the Arduino program I wrote to talk to the Z80:
/*
Zilog Z80 Controller
*/
const int CPU = 0;
const int PIN = 1;
const int DIR = 2;
const int STS = 3;
/* low states = true */
int CLK[4] = {06,13,OUTPUT,LOW}; // in
int INT[4] = {16,0,OUTPUT,LOW}; // in
int NMI[4] = {17,0,OUTPUT,LOW}; // in
int HALT[4] = {18,12,INPUT,LOW}; // out
int MREQ[4] = {19,11,INPUT,LOW}; // out
int IORQ[4] = {20,10,INPUT,LOW}; // out
int RD[4] = {21,9,INPUT,LOW}; // out
int WR[4] = {22,8,INPUT,LOW}; // out
int BUSACK[4] = {23,7,INPUT,LOW}; // out
int WAIT[4] = {24,0,OUTPUT,LOW}; // in
int BUSRQ[4] = {25,0,OUTPUT,LOW}; // in
int RESET[4] = {26,6,OUTPUT,LOW}; // in
int M1[4] = {27,5,INPUT,LOW}; // out
int RFSH[4] = {28,4,INPUT,LOW}; // out
int OLDM1[4] = {27,5,INPUT,LOW};
int T = 0;
void setup() {
// Define Pins
pinMode(CLK[PIN], CLK[DIR]);
pinMode(M1[PIN], M1[DIR]);
pinMode(RESET[PIN], RESET[DIR]);
pinMode(HALT[PIN], HALT[DIR]);
pinMode(MREQ[PIN], MREQ[DIR]);
pinMode(IORQ[PIN], IORQ[DIR]);
pinMode(RD[PIN], RD[DIR]);
pinMode(WR[PIN], WR[DIR]);
pinMode(BUSACK[PIN], BUSACK[DIR]);
pinMode(RFSH[PIN], RFSH[DIR]);
// Setup Serial Port
Serial.begin(9600);
// Reset CPU
Serial.println("CPU Reset");
delay(500);
RESET[STS]=HIGH;
digitalWrite(RESET[PIN],RESET[STS]);
delay(2000);
RESET[STS]=LOW;
digitalWrite(RESET[PIN],RESET[STS]);
}
void loop() {
//Start Clock Period T
digitalWrite(CLK[PIN],CLK[STS]);
delay(500);
// Read Machine Cycle Status M Clock High
M1[STS]=digitalRead(M1[PIN]);
HALT[STS]=digitalRead(HALT[PIN]);
MREQ[STS]=digitalRead(MREQ[PIN]);
IORQ[STS]=digitalRead(IORQ[PIN]);
RD[STS]=digitalRead(RD[PIN]);
WR[STS]=digitalRead(WR[PIN]);
BUSACK[STS]=digitalRead(BUSACK[PIN]);
RFSH[STS]=digitalRead(RFSH[PIN]);
Serial.print(T);
Serial.print("=");
Serial.print(CLK[STS]);
Serial.print(" M1=");
Serial.print(M1[STS]);
Serial.print(" HALT=");
Serial.print(HALT[STS]);
Serial.print(" MREQ=");
Serial.print(MREQ[STS]);
Serial.print(" IORQ=");
Serial.print(IORQ[STS]);
Serial.print(" RD=");
Serial.print(RD[STS]);
Serial.print(" WR=");
Serial.print(WR[STS]);
Serial.print(" RFSH=");
Serial.print(RFSH[STS]);
Serial.print(" BUSACK=");
Serial.print(BUSACK[STS]);
Serial.println();
if(M1[STS]==HIGH && OLDM1[STS]==LOW) {
Serial.println("----M1 Starts----");
}
OLDM1[STS]=M1[STS];
CLK[STS]=!CLK[STS];
T=T+CLK[STS];
}
Tuesday, 9 August 2011
4. The Decoupling Capacitor.
Now stuff that I tell you on this blog is what I am learning as I go. This is no exception. I had no idea what a Decoupling Capacitor was. I kind of knew what a capacitor was. Its similar to the hot water tank in the loft in its function. As you use hot water, it refills the hot water boiler, then it in turn is refilled from the mains water supply. Similarly if you connect a capacitor between the +5V and GND pins on the Z80 CPU it will fill with charge so that when the CPU starts to drain the battery by turning pins on and off the capacitor can take up the slack and keep the CPU with voltage. I used a 0.1uF (microfarad) capacitor. It needs to be as close to the CPU as possible so I just straddled the capacitor directly over the CPU.
Ideally you'll have one on every logic chip, but I opted to just put one on the whole circuit so just decoupled the main +5V supply and ground.
3. What NOT?
Now it kind of goes against the grain coming from a software angle that something is ON when it is OFF and visa versa. I like 0 to represent OFF and 1 for ON. However all the control pins on the Z80 are 'Active Low' which means from a software point of view I have to turn a pin on the Arduino OFF to turn something ON on the Z80. Yes I know very confusing. Fortunately there are logic chips that can switch that around for you. I used some 74LS04 Hex Inverters.
Basically on each chip you can stick in a high voltage and get a low voltage out and visa versa. One pin goes in, one comes out and there are 6 pairs (hence the Hex). Now the Z80 has 13 control pins and so I opted to get 2 Hex Inverters. Ok so that lets me control 12 pins on the Z80, so I will just hook up any pins I don't really need to use at this stage to the +5V supply (remember high voltage means OFF).
At this point I would like to thank Hackman's Realm for a description of how to get a Z80 working. After several attempts at wiring the Z80 to the Arduino I am surprised I didn't blow one of them up by connecting thing up the wrong way, and Hackman's document put me on the right path (I did say I didnt know what I was doing at the start :) ).
So now I can tell the Arduino to set a pin HIGH i.e. ON and via the 74LS04 chip the Z80 gets a LOW signal turning the pin ON.
So what I send to the CPU is NOT what I sent but satisfies the 'active Low' requirements and everyone is happy!
Basically on each chip you can stick in a high voltage and get a low voltage out and visa versa. One pin goes in, one comes out and there are 6 pairs (hence the Hex). Now the Z80 has 13 control pins and so I opted to get 2 Hex Inverters. Ok so that lets me control 12 pins on the Z80, so I will just hook up any pins I don't really need to use at this stage to the +5V supply (remember high voltage means OFF). At this point I would like to thank Hackman's Realm for a description of how to get a Z80 working. After several attempts at wiring the Z80 to the Arduino I am surprised I didn't blow one of them up by connecting thing up the wrong way, and Hackman's document put me on the right path (I did say I didnt know what I was doing at the start :) ).
So now I can tell the Arduino to set a pin HIGH i.e. ON and via the 74LS04 chip the Z80 gets a LOW signal turning the pin ON.
So what I send to the CPU is NOT what I sent but satisfies the 'active Low' requirements and everyone is happy!
2. Arduino hook up.
Last Christmas, I got my wife to buy me an Arduino UNO. I'd had a passing interest in electronics from an early age when my father gave me his Denshi Block electronics set to play with. I just had to open the book of projects and place the components exactly as in the picture, connect up the battery and annoy my mother playing the electronic cat sound all day. So I knew from an early age, what the components were, but not necessarily what they did. This probably lead to me blowing up my ZX Spectrum by adding a reset switch and kind of put me off wiring up anything else and breaking it and instead I entered the world of software.
For £20, the Arduino has all the electronics, all I need to do is program it on the PC to turn a pin on and light up an LED and my interest in electronics is rekindled. If I break it, well I could fork out another £20.
I had a brief play with the UNO at Christmas but don't get much time to play with it until about 8 months later i.e. now. Having tamed the electronic beast and even got it to drive a 16x2 LCD display from Maplin, I start to look for a project. So I buy the Z80 CPU. Fortunately it was the better choice for a project as it can be easily hand cranked, compared to other processors of the same era e.g. the MOS 6502.
All CPUs need a pulse to come alive. Pin 6 on the Z80 the Clock Input and this expects to see a voltage go low then high, then low then high etc. Each time the voltage goes low, the processor moves on a step. For the Z80 it takes at least 4 clock tics to process an instruction. Ultimately the Z80 should be able to jog along at 1 million tics per second or 1 MegaHertz (MHz). I want to understand how the Z80 ticks (no pun intended) and to do this I want to see changes happen visibly (such as an LED going on and off) so I want to control the frequency of the tics.
I begin to wire up the Z80 to the Arduino...
1. Journey begins... well continues.
Back in the 80's, when I was a teenager I had a Sinclair ZX80 (which evolved into a ZX81 via an 8K ROM replacement) and a Sinclair ZX Spectrum. Apart from the obvious Sinclair brand attachment, they all were underpinned by the Zilog Z80 Processor. After getting to grips with the BASIC programming language I discovered the world of machine code programming, writing code that spoke directly to the core of the machine, and so my journey began.
Luckily for me the Z80 was all wrapped up in a nice hardware parcel courtesy of Sinclair Research Ltd with memory, a keyboard and able to hook up to a TV via an aerial input (how quaint!). I didn't have to know about electronics, all I needed to know was how to store bytes representing the Z80 instruction code into memory via the old POKE command and then executing it to do whatever I had dreamed up that day.
My affair with the Z80 came to an end after I tried to wire up a reset switch directly to the chip. It never worked again after that and my Sinclair ZX Spectrum became a door stop.
By this time, the Personal Computer had arrived on the scene and my attention was drawn to this new and shiny world.
25 years later, and after a conversation reminiscing about the good old days of the Z80 and 6502 processors I end up buying a Z80 chip for £5 off of eBay and my journey continues...
Luckily for me the Z80 was all wrapped up in a nice hardware parcel courtesy of Sinclair Research Ltd with memory, a keyboard and able to hook up to a TV via an aerial input (how quaint!). I didn't have to know about electronics, all I needed to know was how to store bytes representing the Z80 instruction code into memory via the old POKE command and then executing it to do whatever I had dreamed up that day.
My affair with the Z80 came to an end after I tried to wire up a reset switch directly to the chip. It never worked again after that and my Sinclair ZX Spectrum became a door stop.
By this time, the Personal Computer had arrived on the scene and my attention was drawn to this new and shiny world.
25 years later, and after a conversation reminiscing about the good old days of the Z80 and 6502 processors I end up buying a Z80 chip for £5 off of eBay and my journey continues...
Subscribe to:
Posts (Atom)